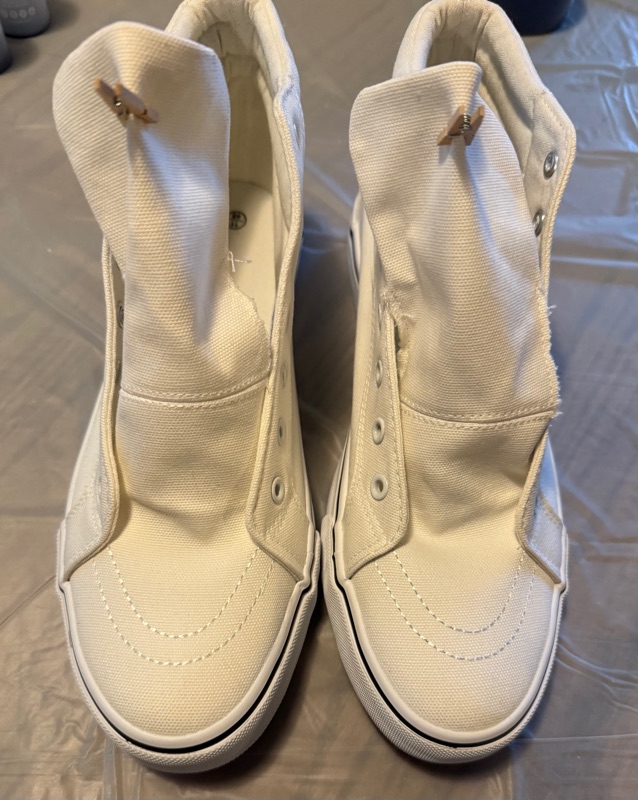
I wanted to make my husband some Galaxy shoes for his birthday. He chose high tops, and he wears size 11, so I needed one tub per shoe. They just fit so for shoes larger than size 11 you will need a larger container. If you are doing size 7 or smaller, they will likely both fit in one container.
To replicate this you will need:
-2 plastic tubs (Dollar store)
-2 cans of shaving cream
-plastic tablecloth (dollar store)
-canvas shoes (I got these off Amazon)
-painters tape
-Tulip Celestial dye kit
-Tulip soda ash
-Synthrapol
-white paint, toothbrush, and tiny paint brush if you want stars
The tulip dye kit comes with the powder already in bottles and with gloves. If you are using dye powder, you will need to also get bottles (2oz ones are sold in 2 packs at the dollar store), gloves, and a mask.
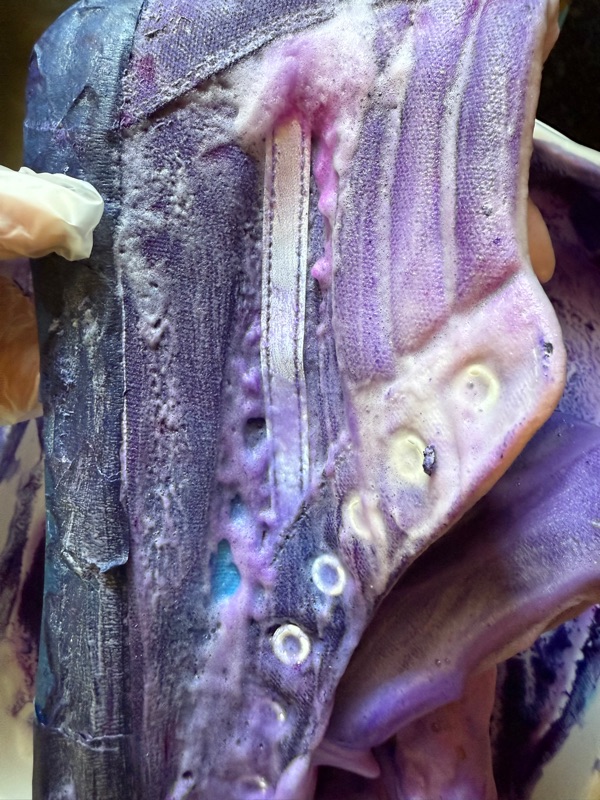
I removed the laces and pulled out the tongues. Following another tutorial, I clipped the tongues for when submerging in synthrapol. I do NOT recommend this as it left a small stain where the clips were. Hopefully the dye will cover it..
Synthrapol says to use 3 tablespoons per 8lb load in the washing machine. For this dollar store tub it equals to 3 teaspoons when it’s full of hot water. I soaked the shoes for 30 minutes in the synthrapol solution.
The tulip soda ash comes with 2 little baggies. I used 1 bag per tub (as each tub held 1 shoe), mixed with lukewarm water until the soda ash dissolved. I soaked these for 25 minutes.

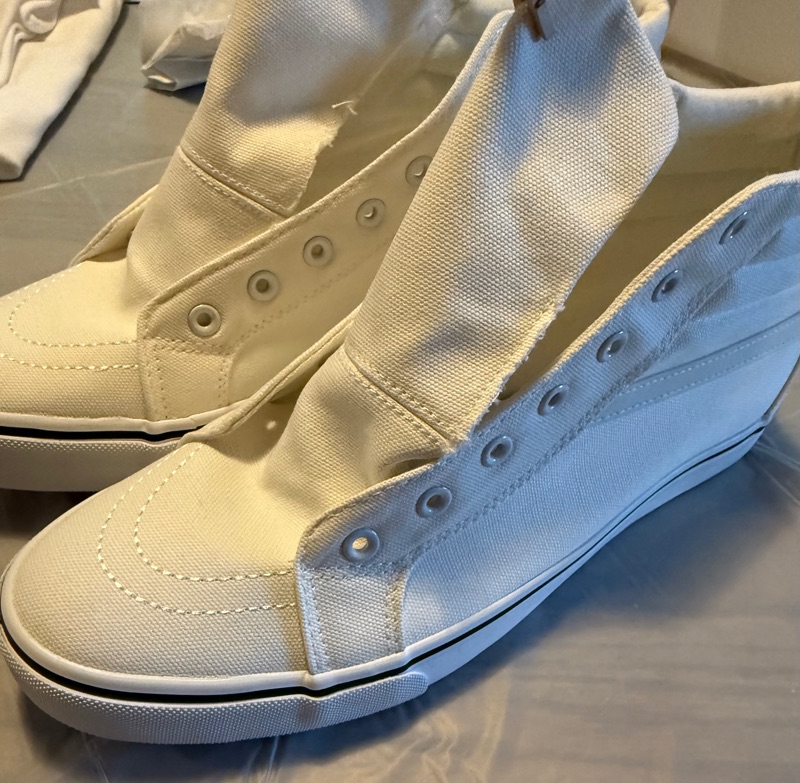
After the soda ash soak, I put the shoes in the washing machine with the canvas facing the outer walls of the machine. I put them on spin cycle (make sure there is no rinse cycle going). Now they were good and damp and ready to begin.
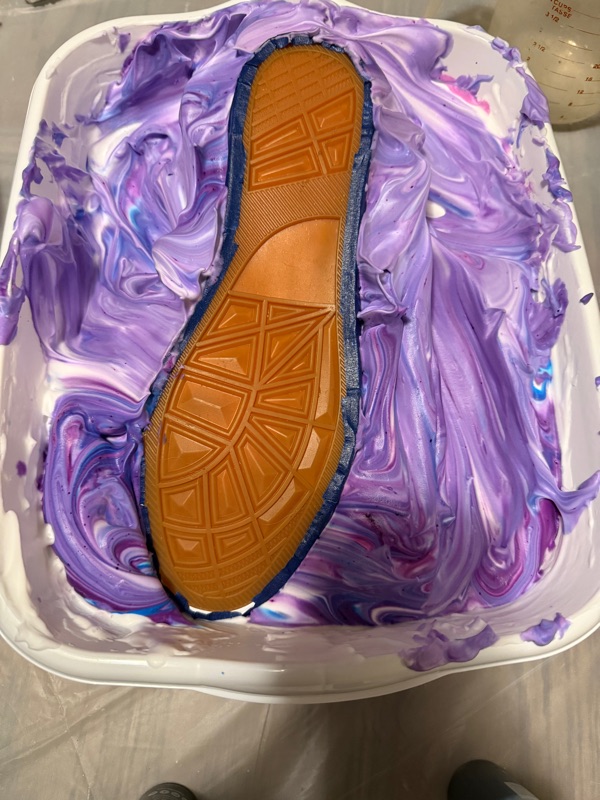
I covered the white rubber part near the soles with painters tape as I don’t want dye on that bit.
I filled each tub with shaving cream and stirred them with a wooden chopstick. I added water and kept stirring until they were the consistency of meringue. It was 1-2 cups of water each I believe. I do NOT recommend the shaving cream from the dollar store as it was really hard to spray.
Once the shaving cream was a meringue consistency, I sprayed the dye in swirls on top. Like the tutorial I followed, I don’t want a lot of white, so I tried to cover most of the shaving cream with dye.
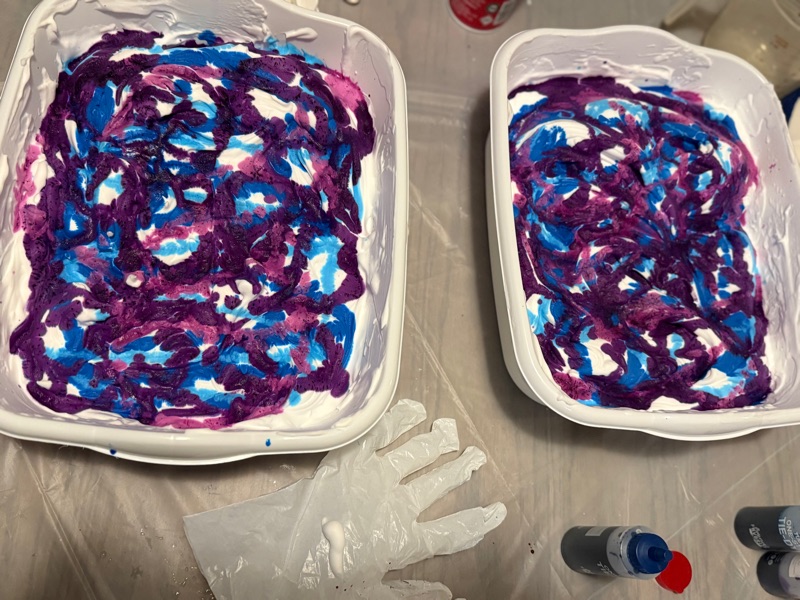
Next I used my chopstick to swirl the colors together until they were a nice swirly lavender.
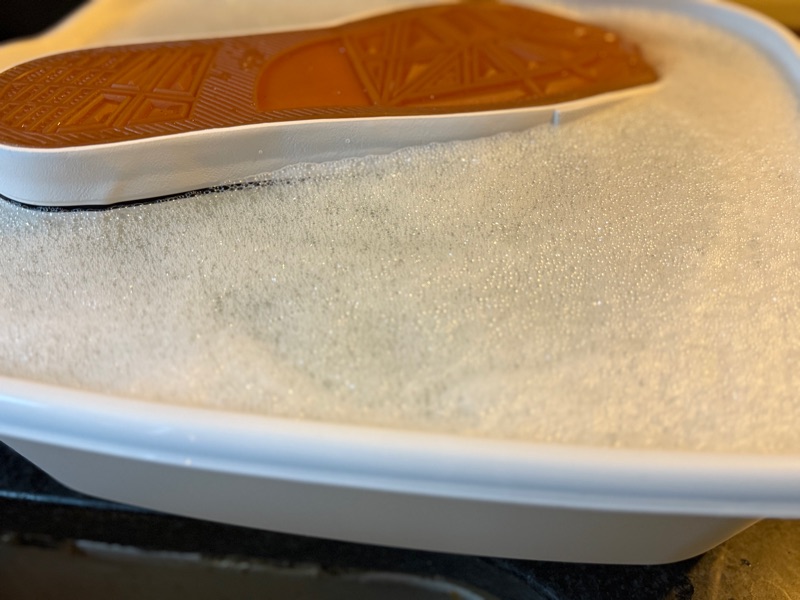
I placed each shoe in the tub and gently rocked them back and forth to ensure they were covered. I scooped some shaving cream up to the edges to make sure they stayed submerged on all parts of the canvas.
After 24 hours, they were ready to come out!
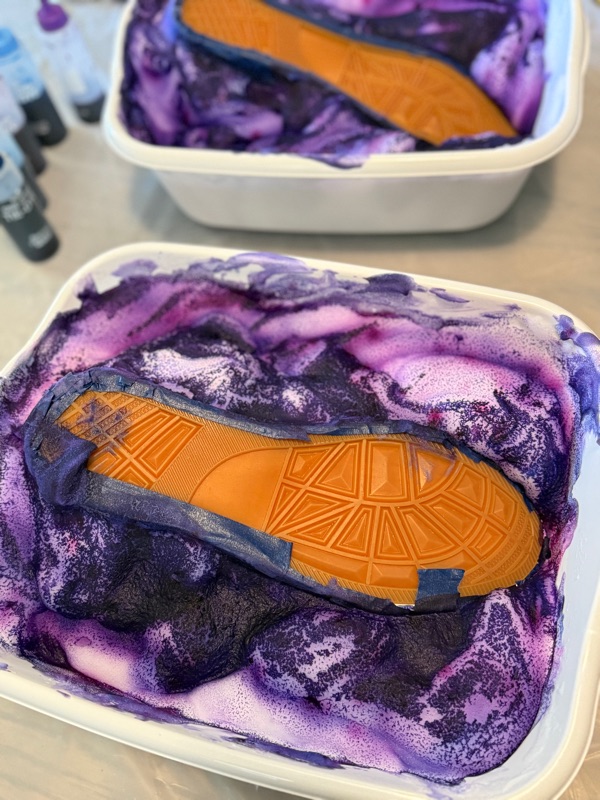
I wanted to wait 24 hours, but we were going to the planetarium for a concert and I was hoping they would be done by then. I took them out after 16 hours.
They look dark enough after 16 hours. You can do as little as 15 minutes if you like the faded look. The longer you leave it, the brighter the color.
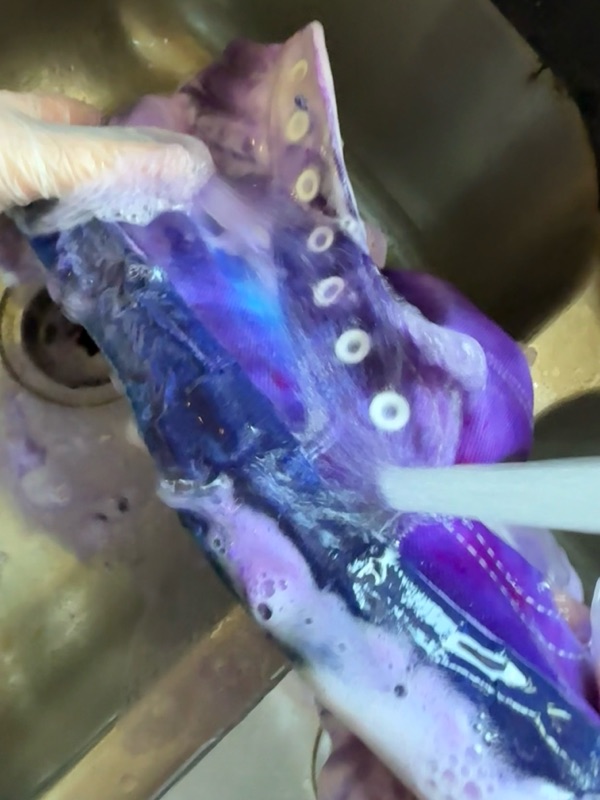
I used my gloved hands to carefully wipe off the shaving cream, then rinsed the shoes under cold water. Once it started to run clear, I rinsed again with hot water. Most of the built up dye seemed to be in the toes as shaving cream had gotten wedged in there.
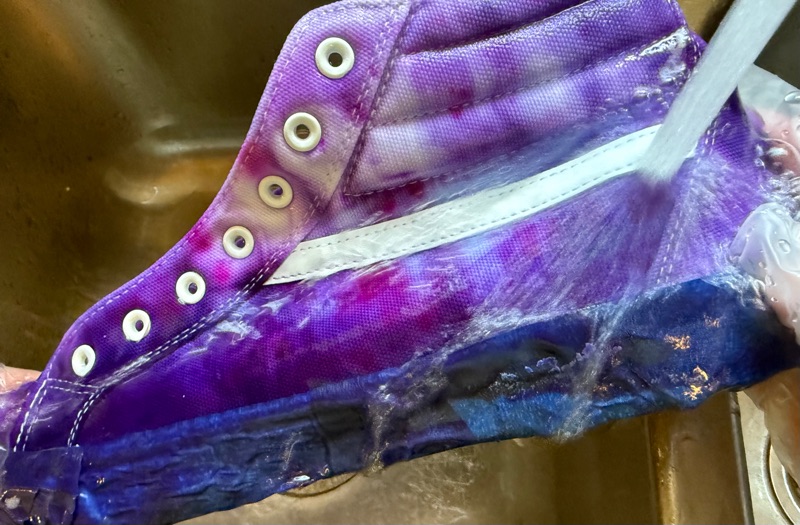
They are looking great! I do wish I had used more blue on top, but my husband said they reminded him of purple high tops he had as a kid so he’s happy. I had used all 3 blues, then the purple, then a tiny bit of fuschia. It seems whatever was the last dye will show up the most.
I put the shoes in the washing machine with 2 tablespoons Synthrapol on warm water delicate cycle, then put them outside to dry. After the last 4 hours of daylight they were still damp so I left them on the air vents overnight.
Once they were finally dry, I painted some stars in acrylic white paint. That was the easy part.
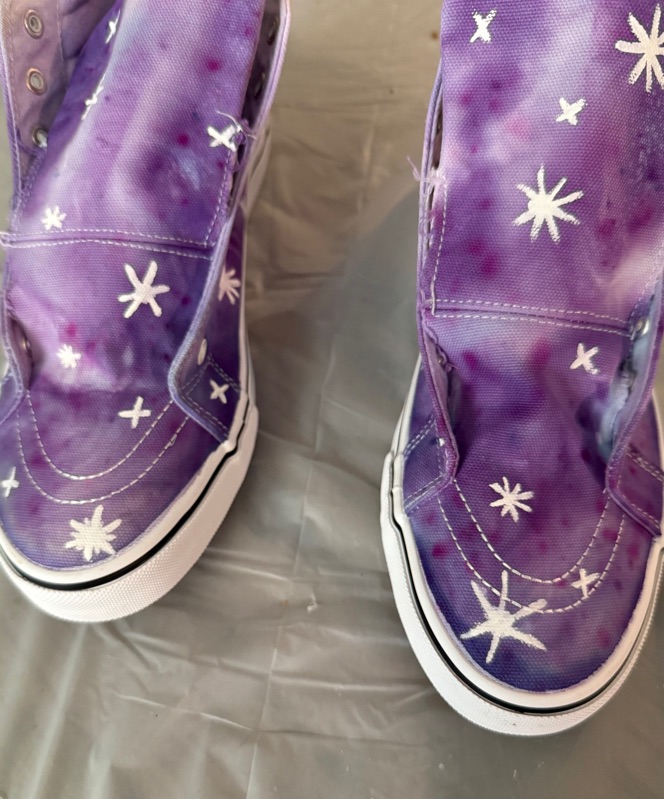
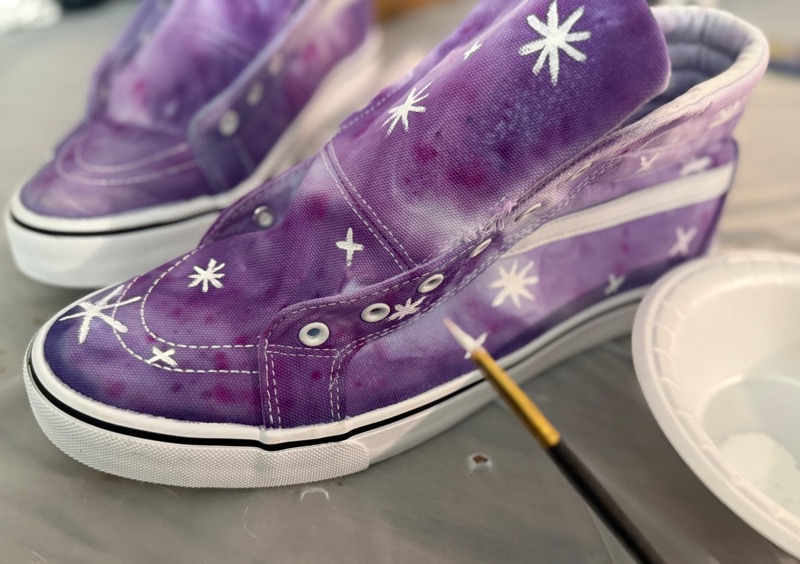
Next I took them outside and used a toothbrush to spray tiny droplets to look galaxy like. I practiced on a box first, but it was still hard to do! It was especially difficult wearing gloves so I had to take them off and get my hands covered in paint. I definitely made a few mistakes, but I went back and tried to make a few of the paint blobs into additional stars. I forgot to tape the base with painters tape again? So I had to use a wet paper towel to wipe the paint off before it dried. If you use painters tape you can avoid that step. Then I left them outside to dry again. Acrylic paint dries pretty quickly, but I did 4 hours to be safe. I did not dye the laces so I just put them back in.

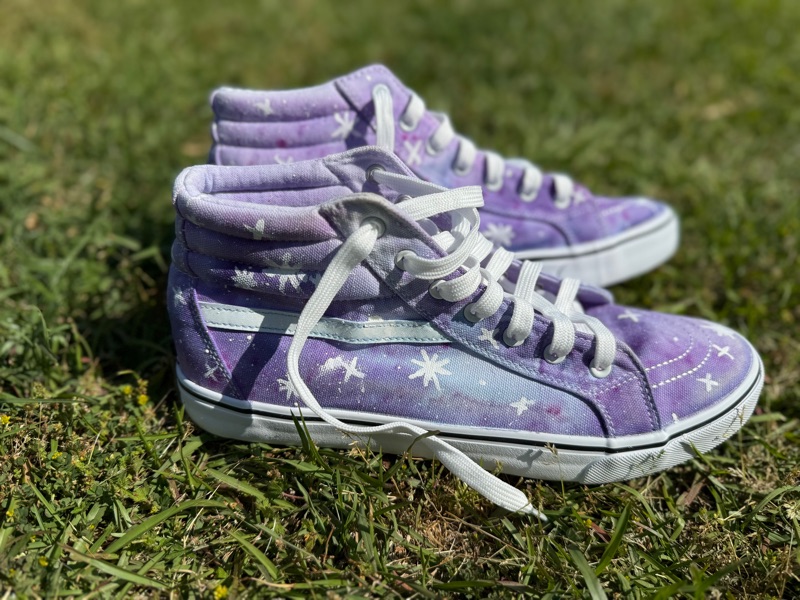
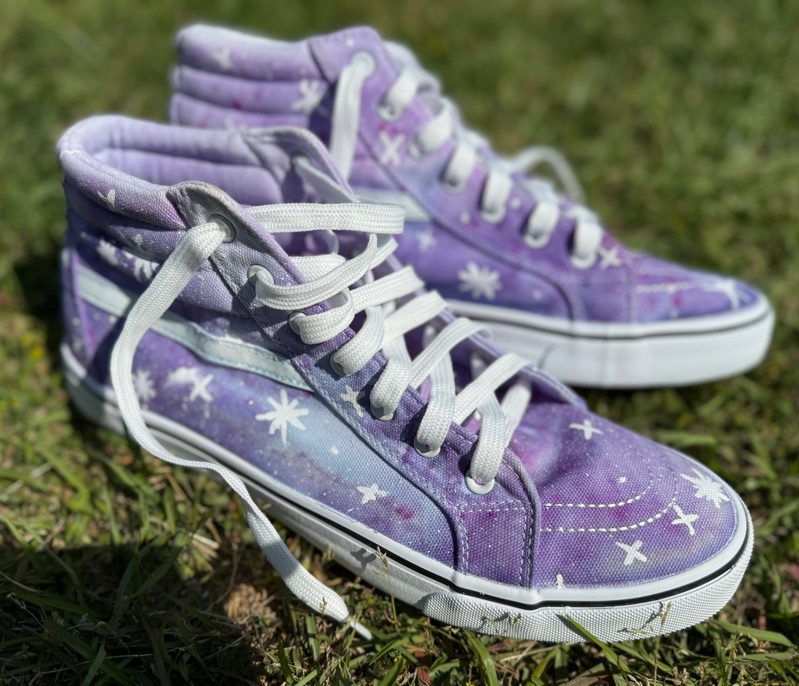
Ta da! Now I want to make a pair for me so we match!
Comments
Post a Comment